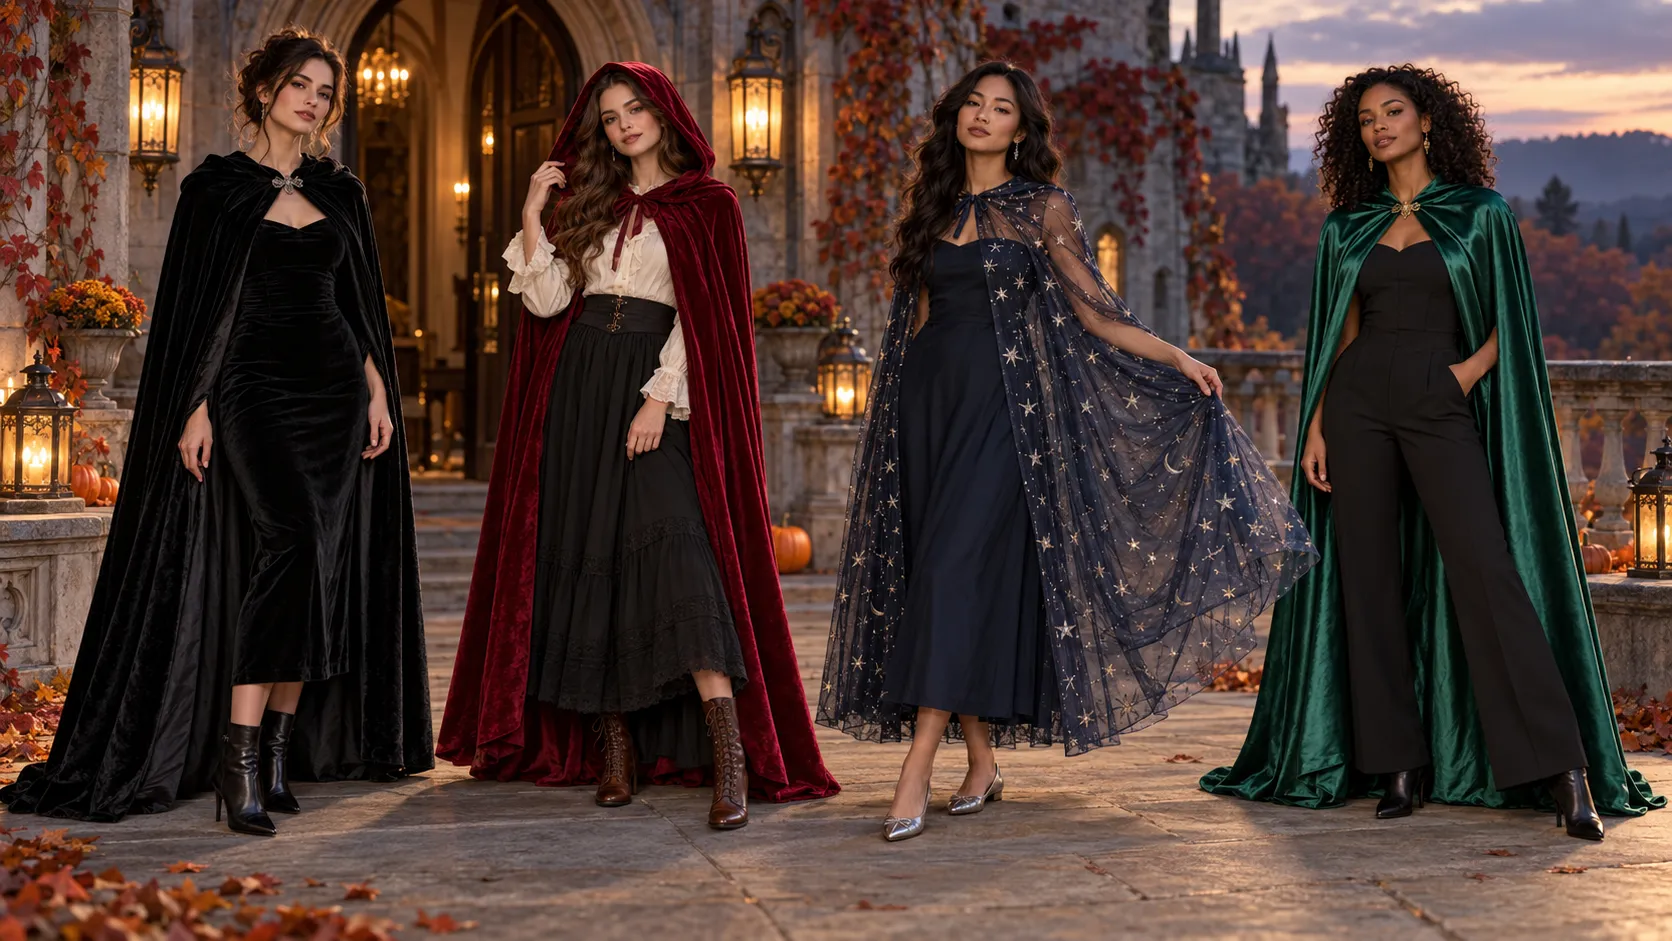
24 Halloween Cape Ideas for a Spellbinding Entrance
Your favorite black dress might be one layer away from a memorable costume. A Halloween cape adds the color, movement, and character that everyday clothes sometimes need.
The secret is choosing one that feels as good as it looks.
A sweeping velvet hem makes a dramatic entrance, but it still needs to clear your boots. A sparkling collar should frame your face without scratching your neck. These 24 ideas balance that visual impact with practical styling advice, covering everything from crimson hoods and celestial shimmer to delicate lace and woodland textures. You’ll find outfit pairings, accessory suggestions, and fit checks to help you build a look around pieces you may already own. Whether your plans involve dancing or an outdoor gathering, there’s a cape here to suit your evening.
Black Velvet Cape
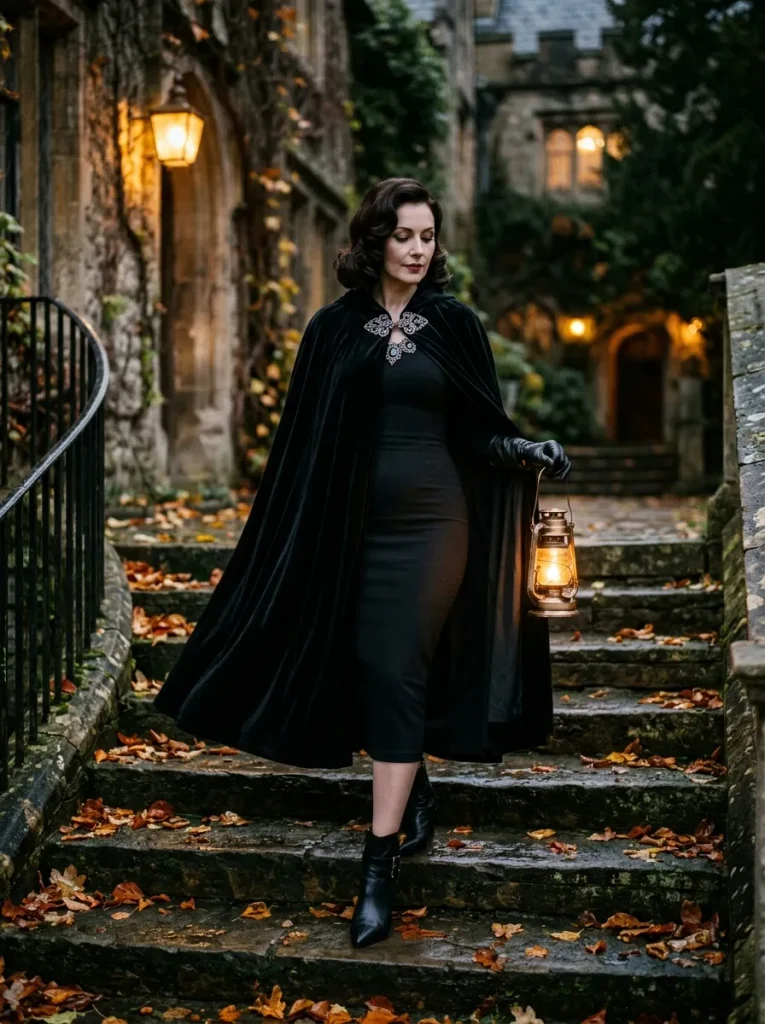
Black velvet brings drama before you add a single costume accessory. Choose a cape that ends above your ankles, then layer it over a fitted midi dress so the silhouette stays defined beneath the fabric. A silver clasp gives the dark outfit a clear focal point.
For a Halloween cape you can comfortably wear all evening, check the shoulder fit with your arms extended forward. The fastening should stay secure without pulling against your throat. Finish with ankle boots and small earrings, letting the velvet provide the texture rather than crowding the neckline with jewelry.
Crimson Hooded Cape

- Give a simple blouse and skirt a fairytale direction with a crimson hooded cape. Choose a red with warm undertones for an autumn palette, or deep wine for a darker mood.
- Keep the blouse sleeves fairly slim so fabric does not bunch beneath the cape. A cream neckline provides contrast near your face.
- Check the hood while turning your head in both directions. It should frame your face without slipping across your eyes.
- Wear sturdy lace-up boots with a hem that clears the ground. Carry a small basket only if you are comfortable holding it throughout the event.
The red fabric already supplies a strong character cue, so a few familiar wardrobe pieces can complete the outfit. For outdoor plans, test the full combination over your intended warm layer before leaving. A hood that sits well over a blouse may feel tighter once a sweater goes underneath.
Also Visit : 21 Dramatic Halloween Cloak Looks You’ll Want to Try
Starry Sheer Cape

Quick Tip:
Let tiny silver stars supply the sparkle without hiding the outfit underneath. Choose soft tulle or mesh that drapes from the shoulders, and pair it with a plain dress so the star pattern stays readable. Check that any attached decorations have smooth backs where they touch bare skin.
A sheer cape creates movement without the bulk of velvet, making it useful for indoor parties. Choose a hem near knee or calf length if you expect to dance. Keep bracelets smooth and bags free of exposed hardware, since rough edges can catch the mesh as you move.
High Collar Vampire Cape
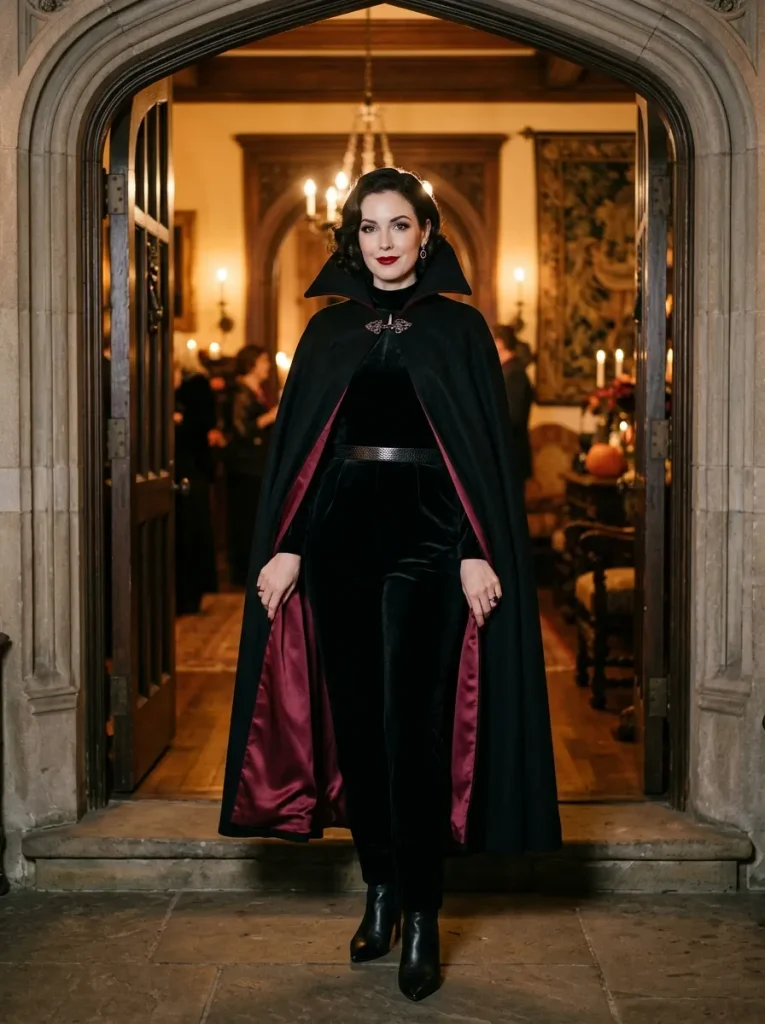
BEFORE: A black jumpsuit can disappear into a dim party setting without a contrasting detail. A soft, oversized collar may also collapse against your shoulders and hide your neckline.
AFTER: A structured vampire collar frames the face, while burgundy lining adds color whenever the cape opens. Small earrings keep the area around the collar clear and comfortable.
Look for a collar that holds its shape without pressing into your jaw when you sit. Test it with your planned hairstyle, especially a low bun that could push it forward. Keep the front fastening loose enough for easy movement, and let the lining provide the outfit’s main contrast.
Scalloped Bat Cape
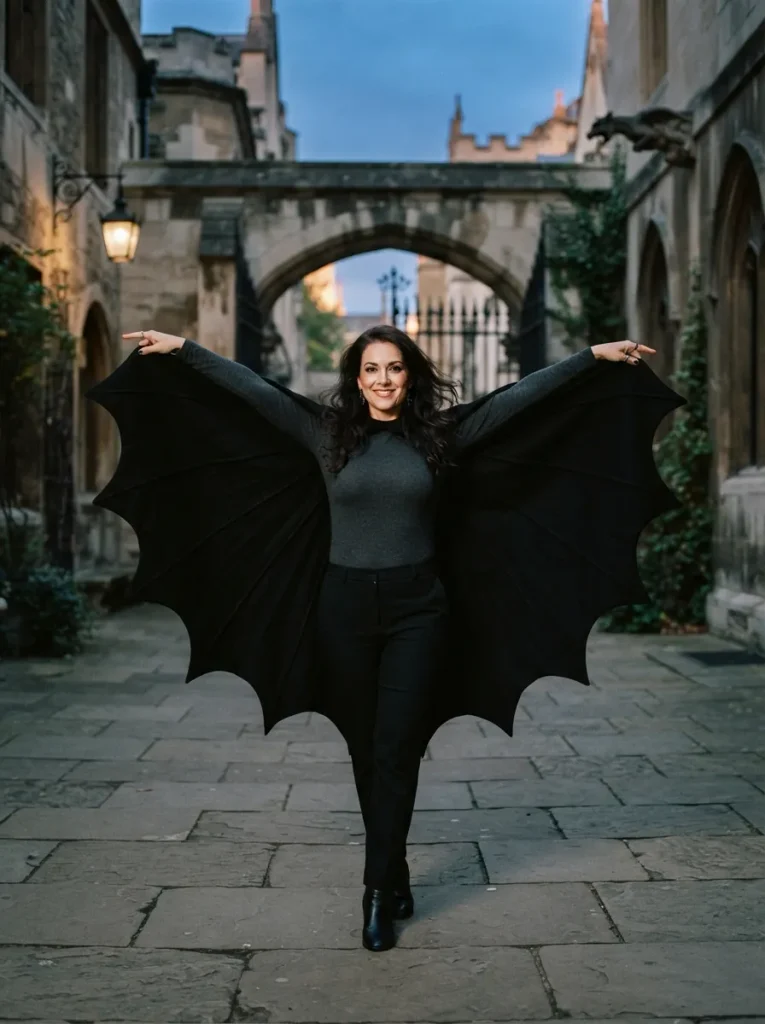
- Turn your arm movement into part of the costume with a scalloped bat cape. Choose a ready-made style with wrist loops if you want the wings to open when you raise your hands.
- Layer it over a fitted charcoal top and slim black trousers. Simple shapes underneath make the pointed wing edges easier to distinguish.
- Check that the wrist loops sit comfortably without pulling the neckline backward. Raise and lower both arms, then reach forward as though opening a door.
- Pair the outfit with flat boots and small stud earrings. Remove the loops from your wrists while eating or carrying drinks.
The wing shape does most of the styling work, so extra bat accessories are optional. Before leaving, check the cape with your arms relaxed; its lowest points should clear the ground. A shorter cut works especially well for crowded parties where long fabric edges can catch on chairs.
Emerald Satin Cape
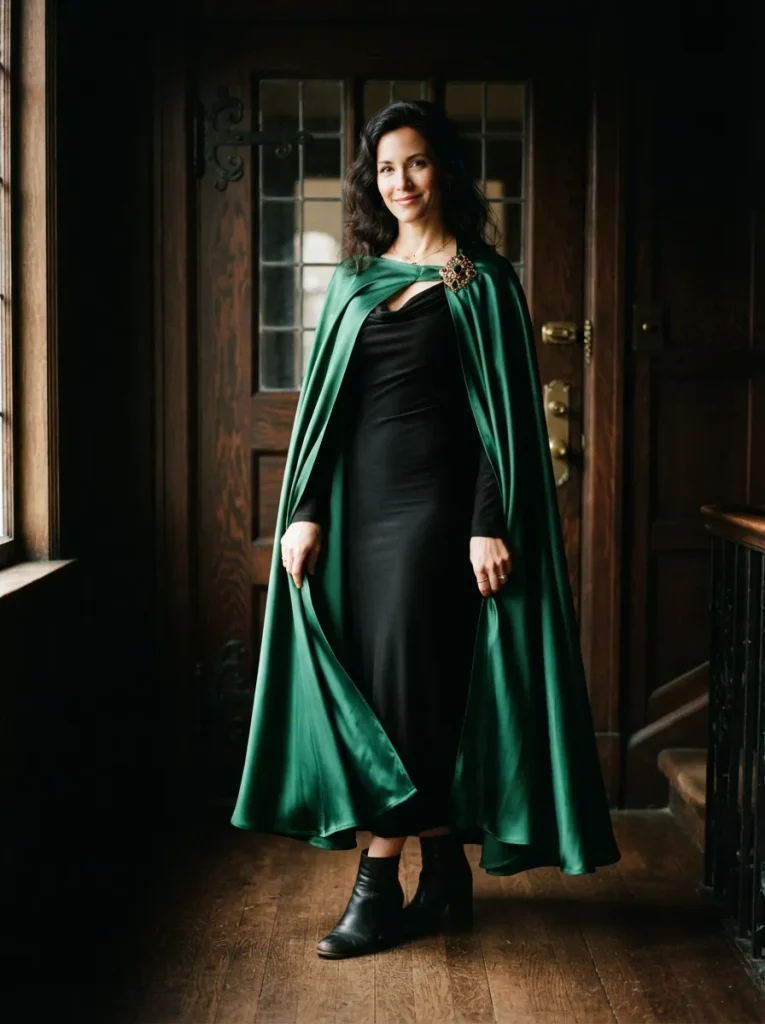
Emerald satin makes a strong color statement, but its surface finish changes how the outfit photographs.
| Detail | Glossy Satin | Matte Satin |
| Light response | Bright highlights along folds | Softer, more even reflections |
| Visual effect | Dramatic shine and stronger contrast | Subtle sheen and clearer color |
| Outfit pairing | Plain black dress and minimal jewelry | Textured belt or small gold accessories |
| Photo check | Watch for glare from direct flash | Check that folds remain visible in low light |
Hold the fabric near your face under the lighting you expect at the event before choosing accessories. A small gold brooch can secure the look visually, but use the cape’s proper fastening to support its weight. Keep bags smooth and compact to reduce rubbing against the satin throughout the evening.
Ivory Lace Capelet
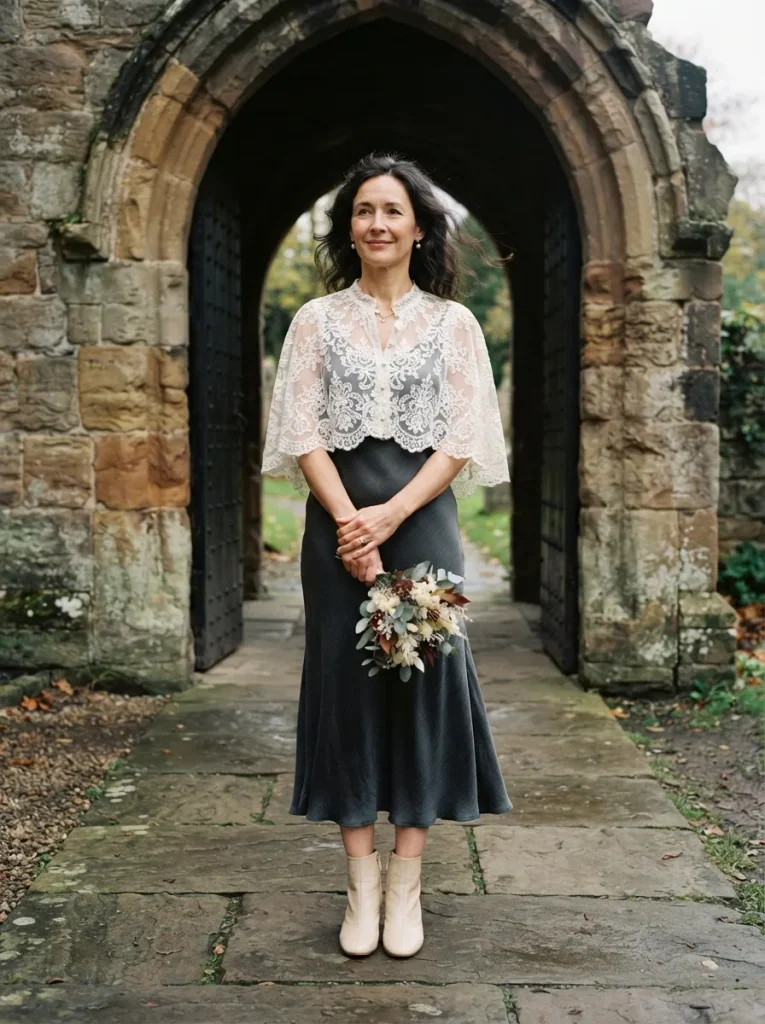
A pale lace capelet gives a dark dress a ghostly bridal twist without hiding its shape.
DO
- Choose a capelet that ends above your elbows for easy arm movement.
- Layer ivory lace over charcoal or black so the floral pattern stays visible.
- Pair the scalloped neckline with small pearl studs.
- Test the closure over your dress before choosing a necklace.
DON’T
- Stack a heavy necklace over delicate lace.
- Wear sharp rings or bracelets that catch the open weave.
- Add a long veil that tangles around the capelet’s fastening.
For a subtle haunted bride outfit, repeat the ivory shade in one other detail, such as a hair ribbon or small bouquet. Keep the remaining accessories dark and simple. Check the lace against your dress fabric while moving your arms, since textured embellishments underneath can snag its delicate threads.
Burnt Orange Cape
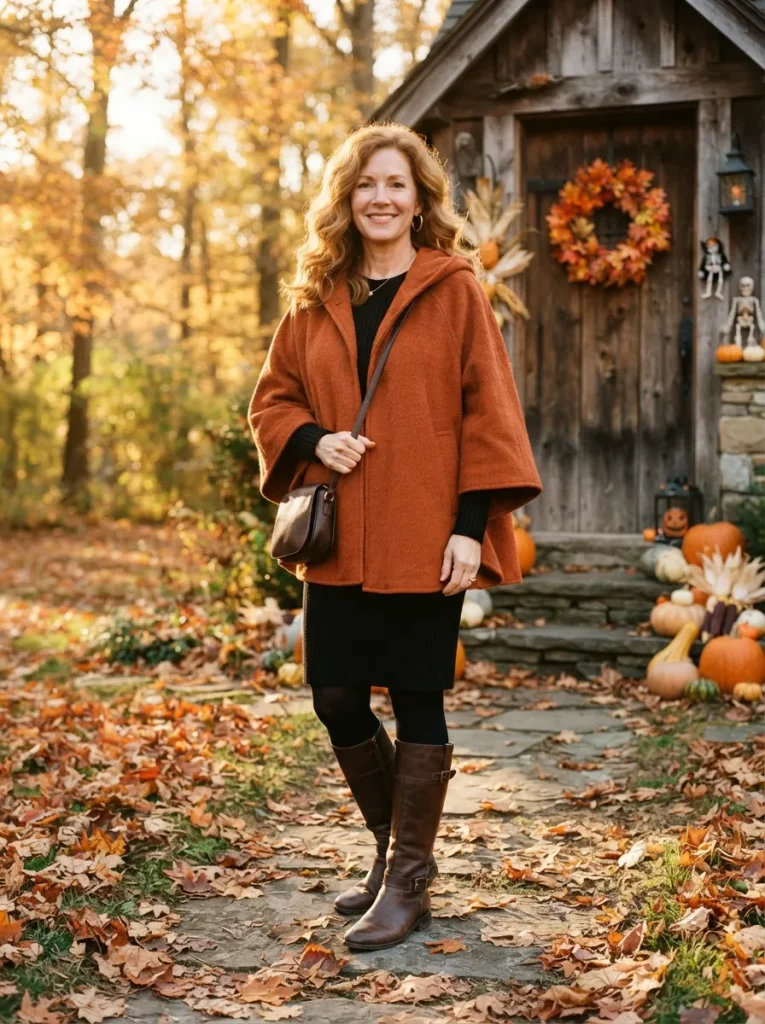
Pumpkin tones can carry the Halloween theme without a literal pumpkin print.
Color Palette: Burnt orange, black, and dark brown.
Base Outfit: A ribbed midi dress or fitted top with trousers.
Best For: Casual costume gatherings and autumn daytime events.
Finishing Detail: A small bronze leaf brooch beside the fastening.
Choose a cape with enough shoulder room for your planned knit layer, especially for outdoor gatherings. Wear the crossbody bag underneath if its strap bunches the fabric, keeping the opening within reach. Black clothing gives the orange a clear outline, while brown boots soften the contrast for a daytime look.
Purple Ombre Cape

Why settle on one shade when the cape can fade through several? A lavender-to-plum gradient gives a simple black dress a distinct sorceress direction. Choose a design with the lightest color near your shoulders to keep the neckline visible, especially if your hair is dark and worn loose.
Keep accessories within the same color family, such as small amethyst-colored earrings or a plum bag. Stand back from a mirror to check where the gradient meets your dress hem; uneven lengths should look intentional. For easier walking, let the cape finish slightly above the dress rather than trail behind.
Silver Spiderweb Cape
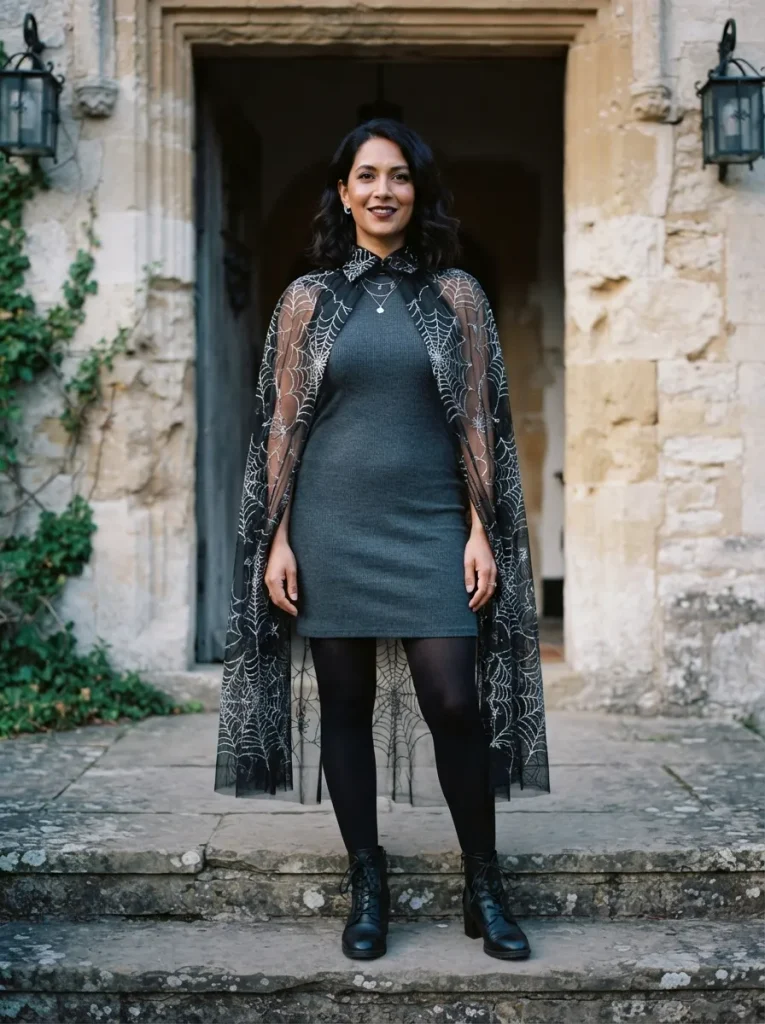
- Let silver web lines become the outfit’s main pattern. Layer the cape over a plain charcoal or black dress so the design stays clear.
- Choose embroidery or a printed web pattern for a flexible finish. Check raised glitter designs for shedding before wearing them over clothing you want to reuse.
- Match the cape length to your plans. A hip-length version leaves more room for sitting, while a longer style shows more of the web pattern.
- Keep jewelry small and smooth, especially around your wrists. Open mesh can catch on bracelet clasps when you lift your arms.
Photograph the cape against both your dress and the background before heading out. Silver threads may stand out under side lighting but become less distinct against pale clothing. For a cleaner outline, keep your hair behind your shoulders and let the web pattern spread across the front without overlapping accessories.
Faux Fur Collar Cape

Quick Tip:
A plush collar can give an ordinary cape a queenly silhouette. Choose a lightweight faux fur trim that lies across your shoulders rather than rising against your chin. Test it over your intended neckline so the two layers do not compete for space.
Pair the textured collar with smooth trousers or a simple dress to keep the outfit balanced. Small earrings are easier to wear than dangling styles that brush the fibers. For a warmer venue, a detachable collar lets you adjust the outfit without removing the cape or changing its overall shape.
Ragged Forest Cape
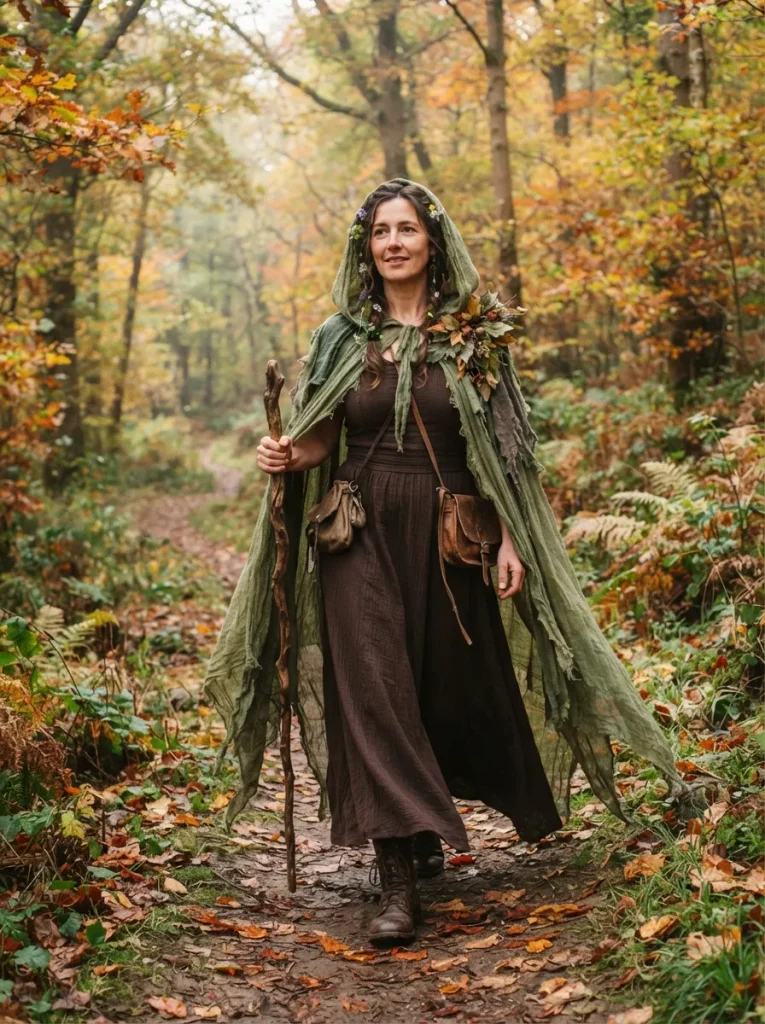
BEFORE: A plain green cape may look more like outerwear than a costume. Random cuts made without checking the length can leave awkward gaps or strips that drag beneath your shoes.
AFTER: Controlled layers of moss-colored gauze create a weathered forest look. A few fabric leaves near one shoulder establish the theme while leaving the neckline and hands clear.
Pin removable gauze strips along the lower edge before deciding their final lengths. Check the shape while wearing your boots, then stitch the strips securely in place. Keep the shortest layers near your hands and every loose end above the ground, particularly if your evening includes stairs or outdoor paths.
Gold Sunburst Cape

- Frame your shoulders with a gold sunburst instead of adding another necklace. Start with a plain black cape that sits flat across the upper back.
- Arrange lightweight gold fabric appliqués around the neckline, keeping them clear of the closure. Pin them in place while the cape lies flat.
- Check the arrangement on your shoulders before stitching. Space the rays so they remain distinct when the fabric falls into folds.
- Repeat the gold in one small accessory, such as flat shoes or earrings. Keep your base outfit plain to leave the sunburst visible.
Metallic details look strongest when they have dark fabric around them, so resist filling every gap with extra rays. Use appliqués that flex with the cape rather than stiff pieces that lift at the corners. Turn and sit during your fitting to check that the shoulder decoration stays comfortable.
Reversible Two-Tone Cape
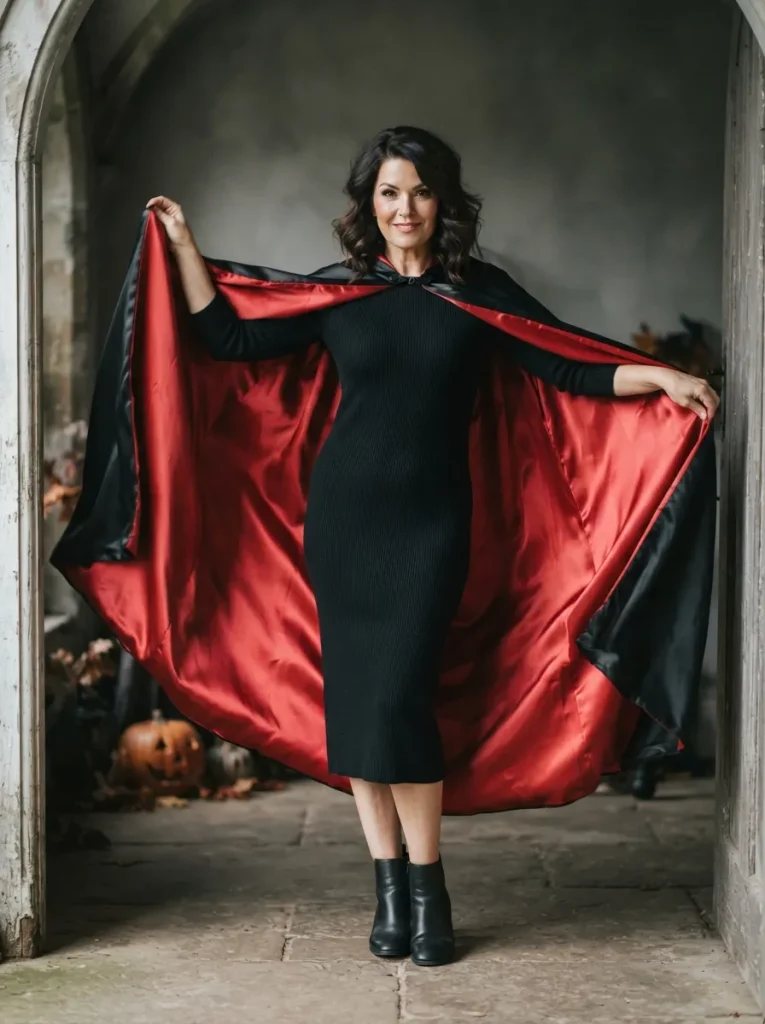
Two contrasting sides give one cape more than one costume direction.
| Detail | Black Side Out | Scarlet Side Out |
| Overall effect | Dark silhouette with flashes of red | Bold color across the full outfit |
| Character direction | Vampire or gothic sorceress | Fairytale heroine or theatrical villain |
| Accessory pairing | Small silver earrings | Simple black belt or dark boots |
| Photo detail | Open one edge to reveal the lining | Keep the front relaxed to show the drape |
Before buying a reversible style, check that the seams and fastening look finished on both sides. Labels near the neckline can become visible when you switch colors. Wear each side over your planned outfit at home, then choose the version that provides the clearest contrast with your dress and accessories.
Raven Feather Capelet
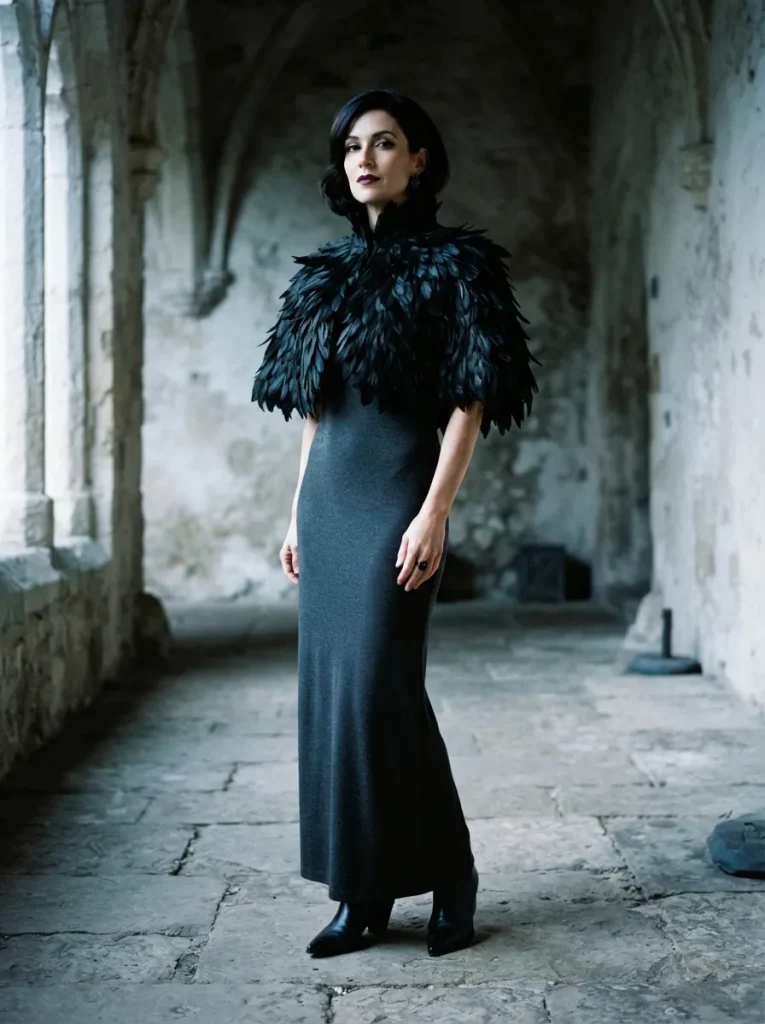
Short, layered feathers give your shoulders a raven-like outline while leaving your arms free.
DO
- Choose soft fabric feathers or flexible faux feather trim.
- Keep the capelet above elbow length to preserve easy movement.
- Pair the textured shoulders with a smooth dress or fitted jumpsuit.
- Shake the capelet gently before wearing it to check for loose pieces.
DON’T
- Wear long earrings that tangle in the feather layers.
- Choose stiff trim that scratches your neck when you turn.
- Carry a shoulder bag whose strap crushes the feather arrangement.
Check the capelet from the side as well as the front, since layered trim can add more shoulder volume than expected. A small handheld bag keeps that shape intact. Leave your neckline simple and pull longer hair back if it hides the feather edges, allowing the raven silhouette to stay visible.
Pearl Ghost Cape
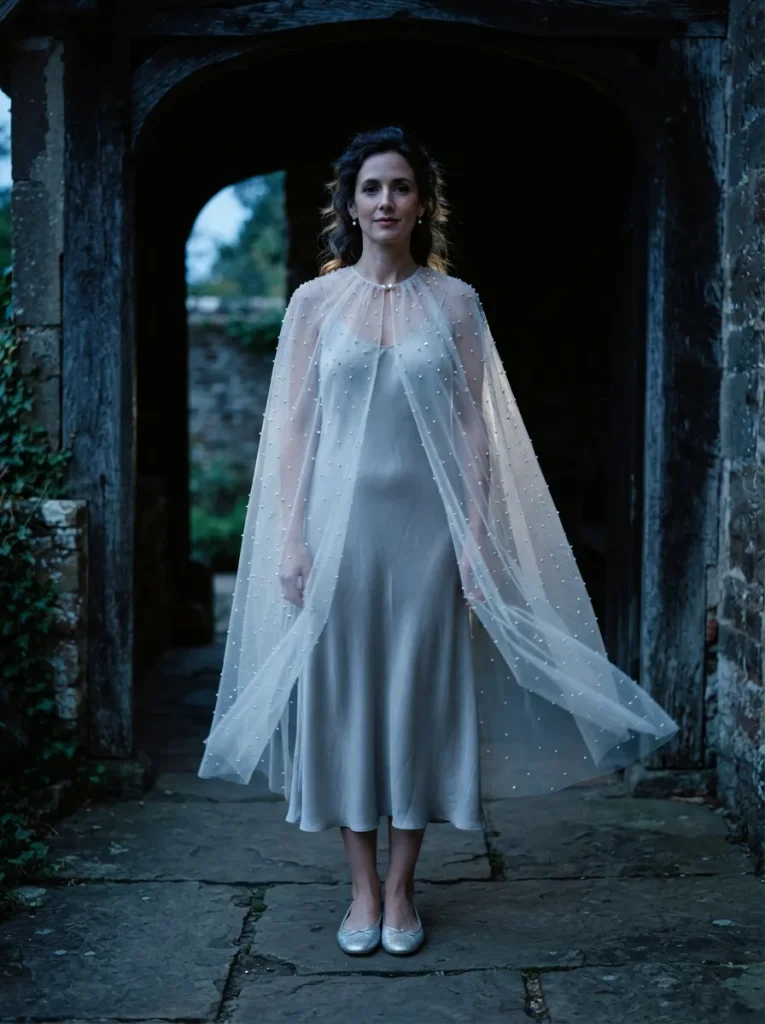
Scattered pearls give a ghostly white cape detail without weighing the look down visually.
Color Palette: Ivory, pale gray, and soft silver.
Base Outfit: A plain midi dress with a smooth neckline.
Best For: Indoor parties and softly lit costume portraits.
Detail Check: Small, securely attached beads spaced away from the fastening.
Choose sparse pearl placement so the sheer fabric still shows between the beads. Dense embellishment can make lightweight organza hang unevenly, especially near the neckline. Try the cape while seated as well as standing, and check that beads along the back do not press uncomfortably against a chair.
Victorian Shoulder Cape
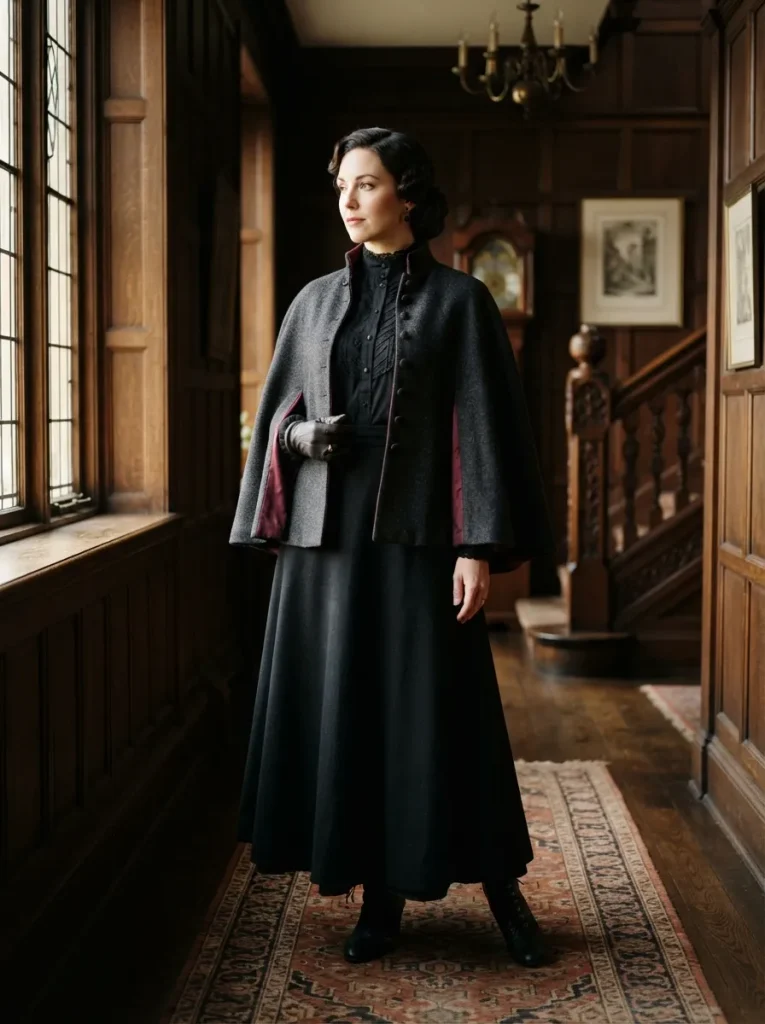
A short shoulder cape makes a long skirt feel like part of a Victorian costume. Choose charcoal fabric with small covered buttons, then layer it over a high-neck blouse. Keep the cape hem above your elbows so the blouse sleeves remain visible and your hands stay free.
For this Halloween cape outfit, use a skirt that clears the tops of your shoes rather than trailing behind. Lace-up ankle boots reinforce the period-inspired look without requiring delicate footwear. If both blouse and cape have collars, fold one down to prevent bunching beneath your chin during the evening.
Iridescent Fairy Cape

- Bring a fairy costume to life with fabric that changes color as you move. Choose an iridescent cape with soft folds rather than a stiff, scratchy finish.
- Layer it over a plain lilac or pale gray dress. A quiet base lets the shifting colors remain visible without competing prints.
- Test the neckline against bare skin before committing to the outfit. Some decorative fabrics feel rougher at bound seams and cut edges.
- Keep any hair accessory small and light. A silver leaf clip repeats the woodland theme without tangling in the cape.
- Check the fabric under indoor lighting as well as daylight. The green or blue tones may appear stronger in one setting.
The cape already provides the visual movement that separate wings would usually add, making the outfit easier to manage in a crowded room. Keep its hem above your ankles and choose a bag with smooth edges. A simple dress underneath also leaves you comfortably dressed if you remove the cape.
Skeleton Print Cape

Quick Tip:
A bold bone print gives a plain black outfit an instant costume identity. Choose a design positioned high enough on the back to remain visible when the cape hangs naturally. Check the print with your arms lowered, since deep folds can hide the ribs.
Keep long hair swept to one side or pinned up so it does not cover the upper spine design. Skip a backpack, which would conceal the main detail. For photos, turn slightly away from the camera and hold one edge outward to reveal the print without stretching the neckline.
Gothic Brocade Cape
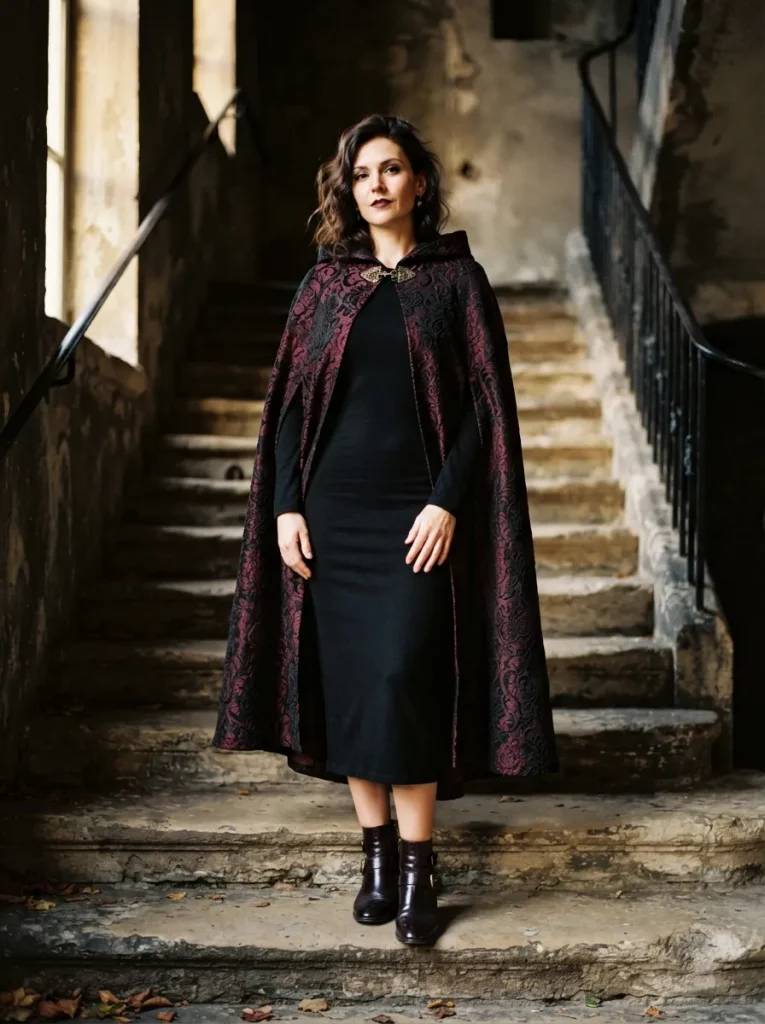
BEFORE: A loose dress beneath a heavy patterned cape can create more volume than you intended. Large jewelry at the neckline adds another competing detail, making the brocade pattern harder to appreciate.
AFTER: A fitted base gives the cape a clearer outline. One small clasp and simple boots leave room for the woven pattern to become the outfit’s main feature.
Check the cape’s weight before planning a full evening around it. Brocade varies in stiffness, and a structured version may resist folding over a chair or into a bag. Walk, sit, and reach forward during your fitting, choosing a closure that supports the fabric without pulling at your throat.
Appliqué Moth Cape
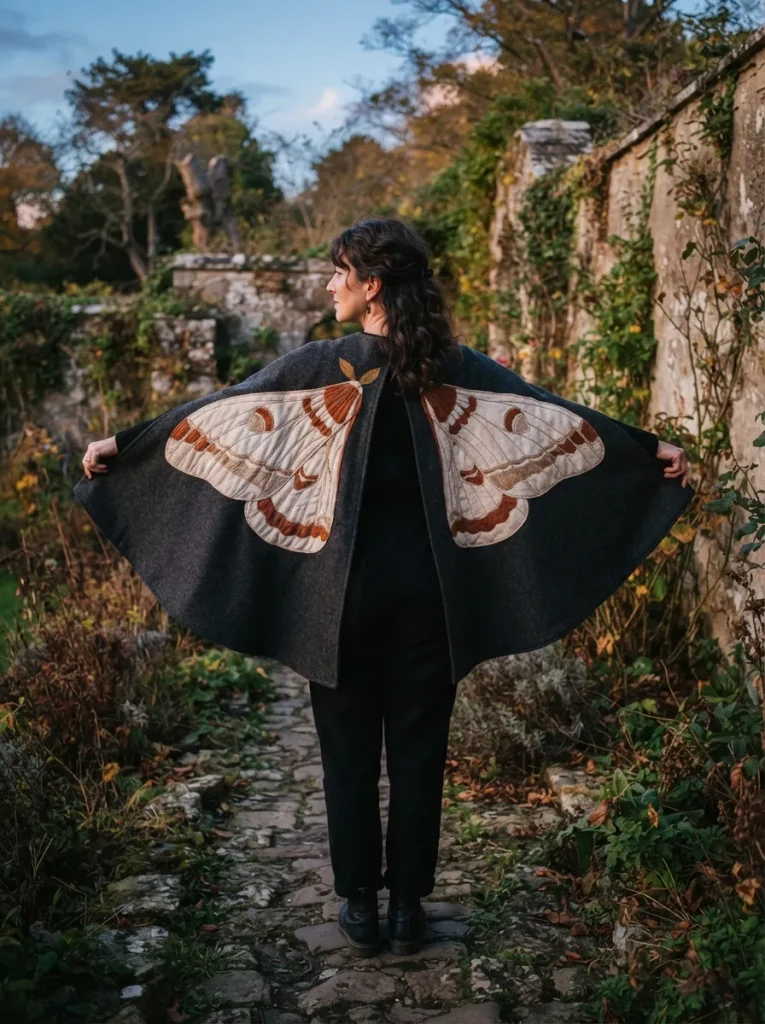
- Turn the back of a plain cape into a moth-wing pattern with matching appliqués. Choose cream and rust fabric that contrasts clearly with the charcoal base.
- Lay the cape flat and mark its center back with a removable fabric marker. Arrange matching shapes on either side, keeping the design clear of the hem.
- Pin the pieces in place, then check the pattern while wearing the cape. Move any markings that disappear completely inside deep folds.
- Stitch the appliqués securely around their edges, removing all pins before wearing. Pair the finished cape with a plain jumpsuit so the wing design stays prominent.
Large, simple shapes are easier to recognize than many tiny markings, especially in evening photographs. Leave the shoulder area mostly undecorated so the cape can settle naturally. If you want to reveal the whole pattern, hold its edges lightly for pictures rather than attaching tight loops around your fingers.
Midnight Sequin Cape

The size of the sequins changes whether your cape gives off a soft shimmer or bold flashes of light.
| Detail | Small Sequins | Large Sequins |
| Visual effect | Fine, closely scattered sparkle | Distinct reflective shapes |
| Overall texture | More continuous-looking surface | More visibly layered surface |
| Styling partner | Plain dress with small earrings | Simple jumpsuit with minimal accessories |
| Comfort check | Feel the neckline for scratchy stitching | Check overlapping edges around your arms |
Look for a smooth lining wherever the cape touches your shoulders or arms. Run your hand gently along the inside seams before wearing it over delicate clothing. Since sequins already catch attention, leave your neckline bare and choose a compact bag without exposed hardware that could catch the embellishment.
Crimson Ribbon Cape
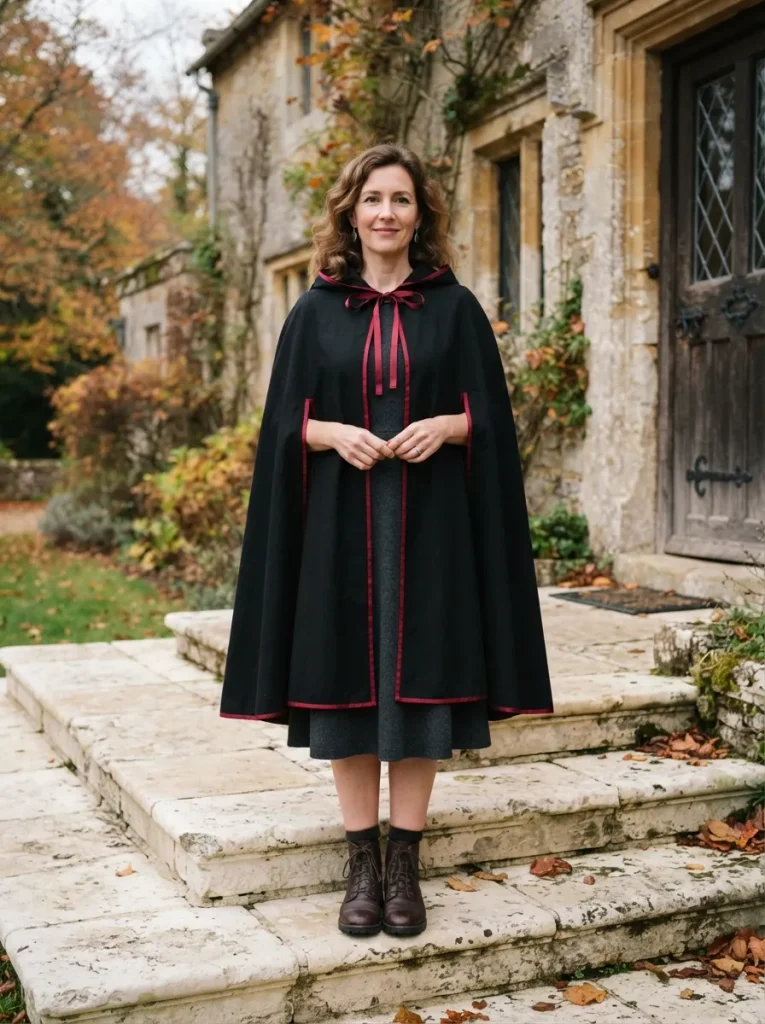
A narrow red border gives an ordinary black cape a clear outline without adding much bulk.
DO
- Choose flexible ribbon that follows the cape’s curved edge without twisting.
- Pin the trim in place before sewing, checking that both front edges match.
- Keep decorative bow tails short enough to stay clear of your hands.
- Use the original cape fastening to support its weight.
DON’T
- Pull the ribbon tight while stitching, which can gather the cape fabric.
- Depend on a decorative bow to hold a heavy cape closed.
- Leave loose ribbon ends trailing near your shoes.
Test a short section of trim near the lower edge before sewing the entire border. If the ribbon puckers around a curve, use narrow bias binding instead. Repeat the crimson in lipstick or a hair clip, keeping the rest of the outfit simple so the finished edge remains noticeable.
Patchwork Witch Cape
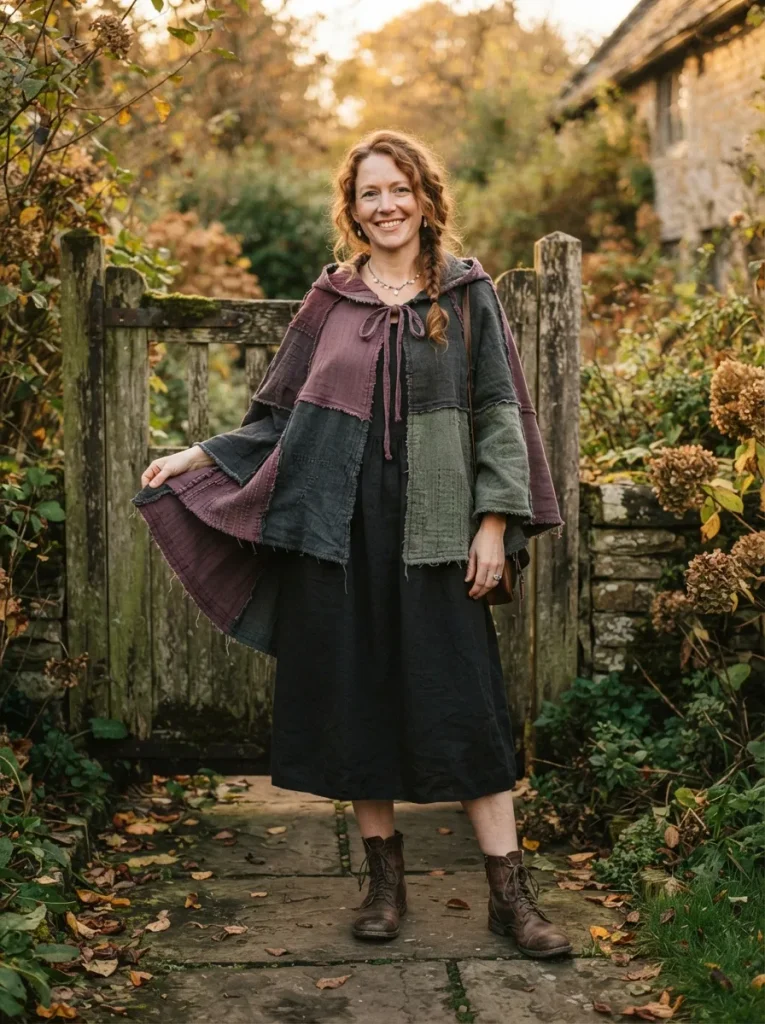
Mismatched fabric pieces can give your witch outfit a distinctive look without needing elaborate accessories.
Color Palette: Muted plum, charcoal, and moss green.
Materials: A plain cape, lightweight fabric patches, thread, and sewing supplies.
Skill Level: Beginner for adding patches to an existing cape.
Best Detail: Visible contrasting stitches around a few larger patches.
Choose scraps of similar weight so one section does not pull harder than another. Arrange the patches while the cape lies flat, then check their placement on your body before stitching. Leave the shoulder seams clear to preserve the drape, giving your Halloween cape character while keeping it comfortable to wear.
CONCLUSION
A memorable costume can start with clothes you already love and one expressive layer. These Halloween cape ideas give you room to explore rich velvet, shimmering stars, playful wing shapes, or softer ghostly details while keeping comfort in mind.
Choose one look to try, check the length with your shoes, and practice moving before the event. Small adjustments can help you enjoy the outfit all evening. Save this post on Pinterest to revisit your favorites, and share it with a friend planning her costume. Pick your cape, add a few thoughtful accessories, and step into Halloween feeling ready to celebrate.





One Comment